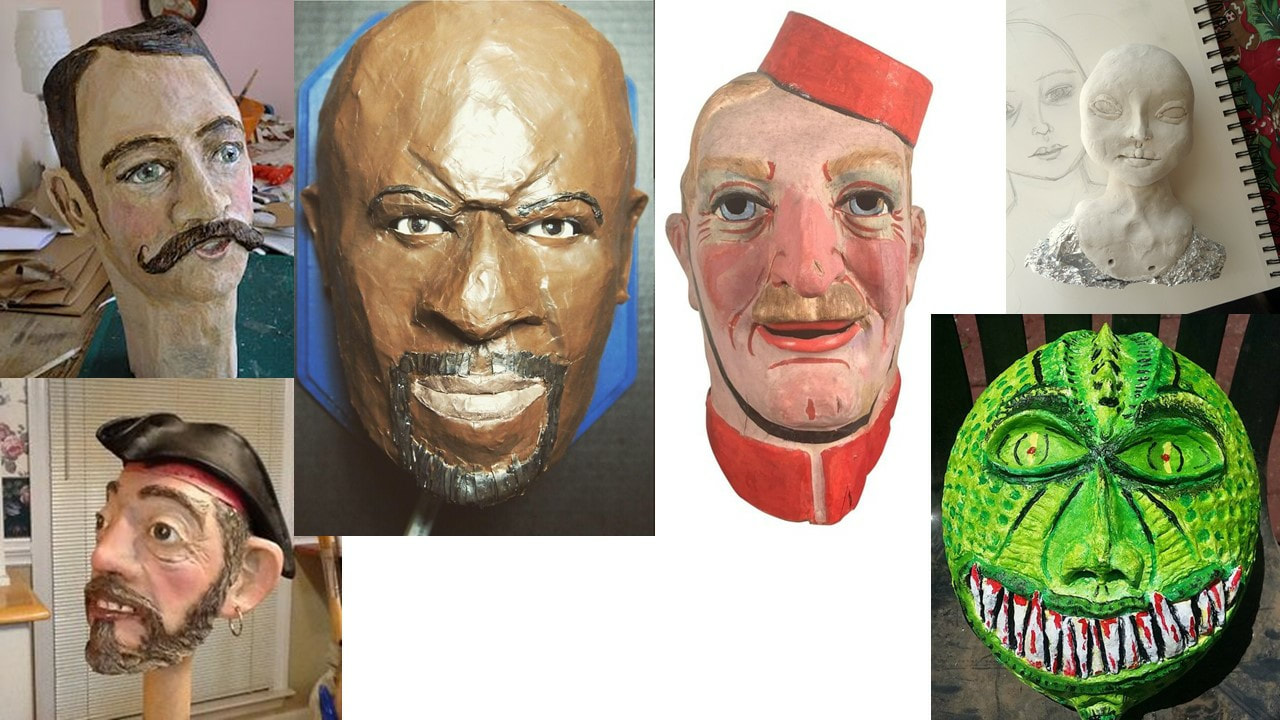
Michael England Art .com
  • Home
  • BHS
  • ART
  • Intro to Art
    • Deities and the Ancient World
    • Illuminated Manuscripts
    • Renaissance
    • Dutch Masters
    • Romanticism
    • Realism
    • Impressionism / Pointillism
    • Art Nouveau / Belle Epoch
  • 3-D Art
    • Beg. 3-D >
      • Patterned Text
      • Cardboard Sculptures
      • Ceramic Food
      • Head Vessels
      • Animal Hybrids
    • Adv. 3-D >
      • Paper Clay Face
      • Wearable Heads
      • Ceramic Lanterns
      • Dinner Set
  • 2-D Art
    • Beg. 2-D >
      • Materials Exploration
      • Tattoo
      • Surrealist Collage
      • Ransom Letter Collage
      • Cave Drawing
      • Perspective
      • Knolling
      • Monochromatic Figures
      • Tessellations
      • Call to Action Poster
      • Zentangle
    • Adv. 2-D >
      • Watercolor Landscapes
      • Blind Contour Portraits
      • Derrick Adams
      • Character Anatomy
      • Royal Flush
      • Graphic Novel
      • Virtues
  • Photo
    • Beg. Photo >
      • Elements in the H.S.
      • Editing Photos
      • Photo Letters
      • Action Figures, In Action
      • Multiples in a Shot
      • Reflections
      • Color Wheel Photo Collage
      • Sequences
      • Leading Lines
      • Forced Perspective
      • Symmetry
      • Photo to GIF
      • Final Project
    • Adv. Photo >
      • Spring Break
      • Framing
      • Triptychs
      • Product Photography
      • Joiners
      • Picture Through an Opening
      • Narrative Photos
      • Final Project
  • Yearbook
    • Layout
    • Editing via PIXLR
    • Forced Perspective
    • Photo to GIF
    • Joiners
    • Narrative Photos
    • Leading Lines
    • Product Photography
    • 2 Color Portraits

Paper Clay Face

Picture
https://www.instructables.com/id/Paper-Clay-Mask/
Begin by drawing faces on paper.
Consider all of the components that go into a face (Eyes, ears, nose, mouth, teeth, eye brow, dimples, wrinkles, etc.) 

Draw 2-4 sketches to start and begin to develop a final portrait as large as a piece of paper.... you will model your sculpture off of this picture.. 

Once happy with a face to create, begin by adding layers of wadded up paper and masking tape to a flat piece of cardboard.
Make sure the paper is dense and has a relatively flat surface once you are near completion.
Use paper to make raised areas for eye brows, noses ears etc. 

When you are finished building with paper, begin smoothing on thin layers of paper clay NO THICKER THAN 1/4 OF AN INCH at a time... otherwise it will take a LOOOOOONG time to dry.

Once fully covered allow to dry, sand any sharp or pointy parts down/off with sand paper ...

finally, PAINT IT!


Proudly powered by Weebly